INTERFACE™

Insert Columns

INTERFACE™
|
 |
This page describes how to insert new columns, so that you can change your column arrangement.
A the top of the list is a column header which contains the names for each column. It looks like this:
![]()
It is not possible to insert columns on the fixed
![]() side of the list on the left. You can insert any column you
like on the right.
side of the list on the left. You can insert any column you
like on the right.
To insert a column click the Insert Column button

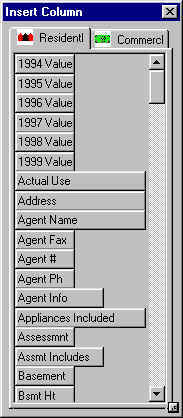
When you do this a menu of all possible columns will appear on the right.

You can scroll through the menu to find the column label you want. The column labels
are arranged alphabetically. Once you find the column label that you would like to insert,
drag it into the column header and drop it in its intended new
location. A ![]() will appear in the
column header before you drop the column label, indicating where it will be inserted. If a
will appear in the
column header before you drop the column label, indicating where it will be inserted. If a
![]() does not appear then the
column label you are dragging is not over the column header
and you will not be able to insert it.
does not appear then the
column label you are dragging is not over the column header
and you will not be able to insert it.
You can close the Insert column window by clicking the
![]() in its top right corner when you are finished with it.
in its top right corner when you are finished with it.