
Important Note: The following instructions have been carried forward from the original PocketINTERFACE™ module help file. These instructions do not apply to the the new WIRELESS PocketINTERFACE™. It is recommended that anyone considering the purchase of a PDA, buy a device that has wireless capabilities. These types of PDA's are commonly referred to as "Smartphones". For some useful purchaseing tips click here.
What you need ... any device running the Palm™ OS (operating system) - configured and working properly.
Step 1: Pocket INTERFACE™ is started from the File menu ...
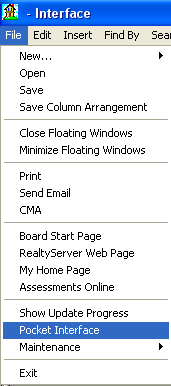
When you click on Pocket Interface the following window opens ...
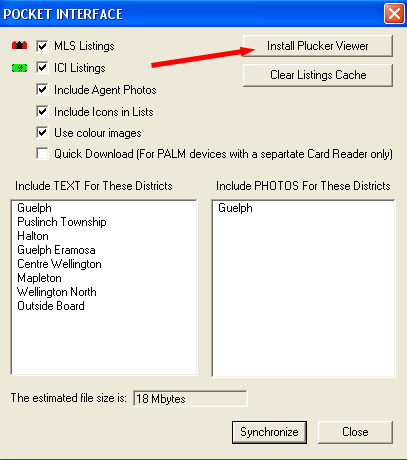
You must install the Plucker Viewer files prior to using Pocket INTERFACE™ for the first time. Click on the "Install Plucker Viewer" (as shown above) to install the software to your Palm™ device. The following window opens ...
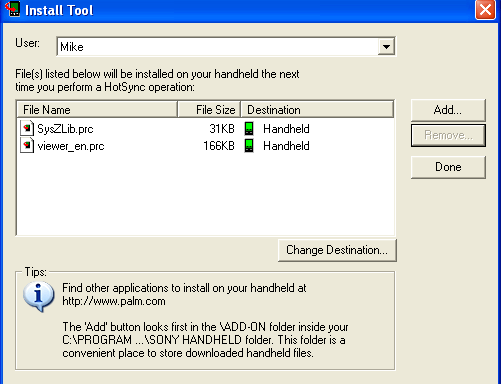
The Plucker software includes the two files SysZLib.prc and viewer_en.prc (shown above). These files are to be installed onto the "Handheld" (main memory of the device). DO NOT install these files to your SD card (external memory). You can see that the "Destination" of the two files is "Handheld" - this is correct. To install the files to the Handheld - start the HotSync process.
Step 2: The data file you wish to transfer from INTERFACE™ to your Palm™ OS device is created by selecting items from the POCKET INTERFACE window. In the example below, we will assume we have Palm T3 with an SD card (external memory). We have selected the five items listed next to the check boxes as shown ... Note: The "Quick Download" check box is only to be selected when you are using a PDA device with a separate card reader or any device with a built in card reader.
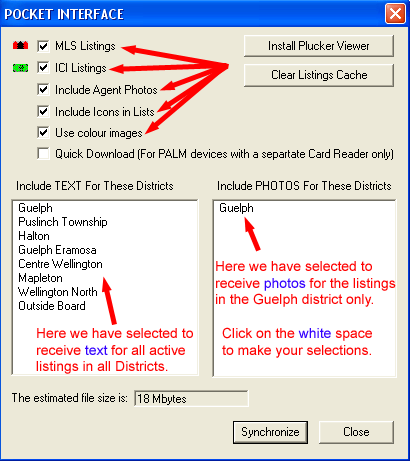
In the above example, we have included text for all listings, in all districts, and we have also included photos for one of the districts.
The estimated file size will assist you in determining how large the data file will be when it's created by INTERFACE™. Depending upon the storage space available on your device, you can mix and match different combinations of data and photos. The estimated file size will be re-calculated as you make your choices.
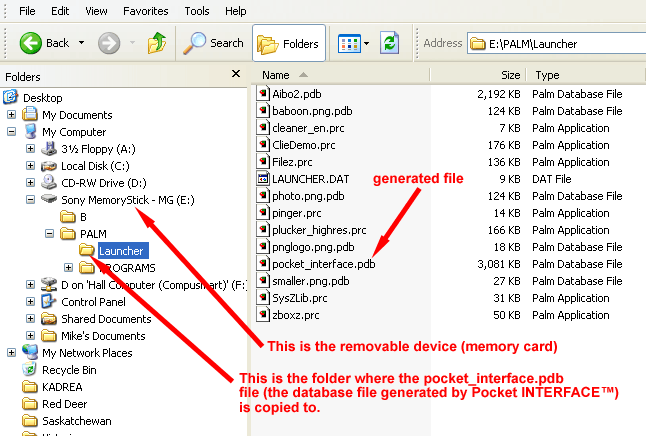
Important Note: If you are using a Sony device you must have the MS Export/Import software installed. The MS Import program is a program that connects your device to your computer. You must always connect your device to your computer with the cable connection and then start the MS Import software prior to clicking Synchronize. Your device will now be ready to receive the file generated by Pocket INTERFACE™. This file will be automatically copied to the device. If you are using a Palm™ device with a separate card reader, ensure the card reader is recognized by your computer. The easiest way to check to see if your device is recognized is to open Windows Explorer and see if the removable device is available. See the following screen shot example ...
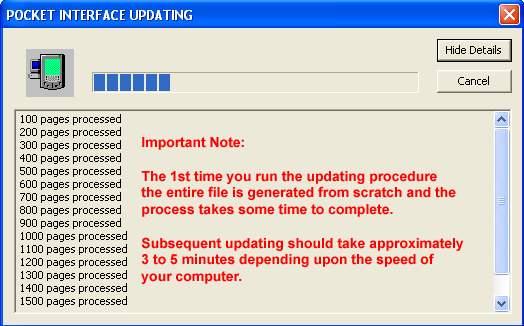
Step 3: Ensure your device is connected to your computer, your memory card is installed and/or your card reader is connected (if applicable). Next click on the Synchronize button to create the data file. The pocket interface updating window opens as follows ...
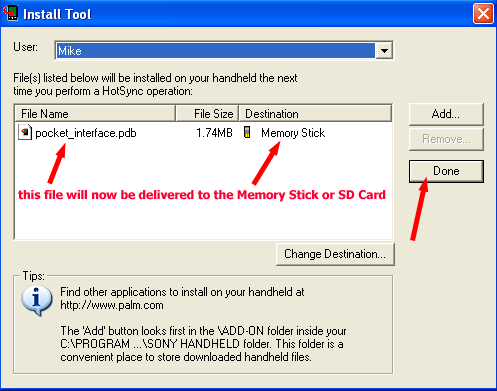
Step 4: Depending upon the Palm™ OS device you are using a data file named pocket_interface.pdb will be generated by the INTERFACE™ program. This file, if you have an SD Card, will be transferred to the card as soon as the updating is finished. If you are not using a separate memory card, the pocket_interface.pdb file will be delivered to the HotSync file folder as shown below ...
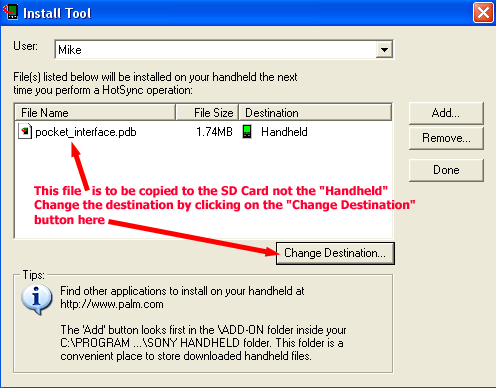
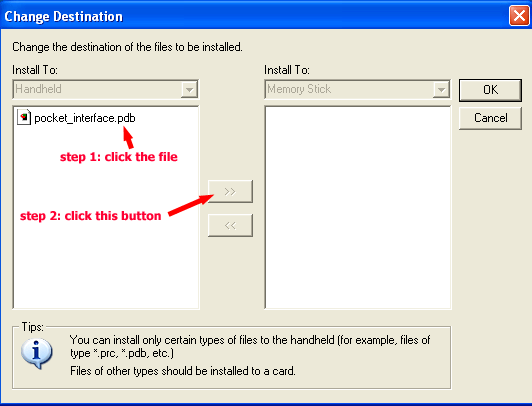
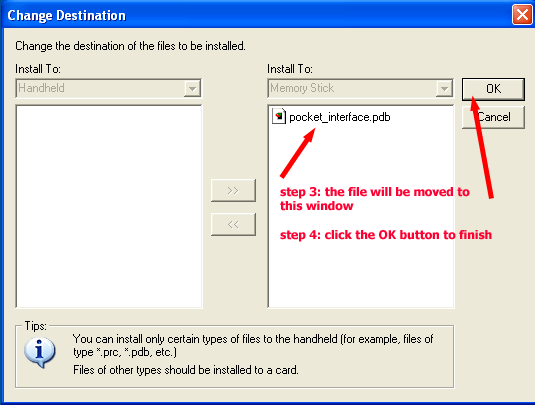
Note: You must change the destination and deliver the pocket_interface.pdb file to the SD Card. To do this highlight the pocket_interface.pdb file by clicking on it, then click on the "Change Destination" button. The following window will open ...
Step 5: After the file is on your device, click on the Plucker icon in the "Unfiled" category or "All" category of your Palm™ device to start the program. To assign a Hot Key to start the program using a front button on the device see Useful Tips
Note: Please read the Useful Tips ... "buying tips" and "other" information.