INTERFACE™

How to Adjust your Windows Explorer View Settings

INTERFACE™
| |
This page describes how to adjust the View Settings in Windows Explorer.
Windows Explorer has a number of settings which control what you see and how you see it. If you have different settings than those recommended here you may be unable to see some files or folders on your hard drive, you may see incomplete information, or you may see things differently than the way they are shown in this tutorial. Before you telephone for technical assistance, adjust your view settings as shown on this page.
If it is not already running, Start Windows Explorer as follows:
1. Click ![]() to
open the Start Menu.
to
open the Start Menu.
2. Then move your mouse up to
![]()
3. Then on the menu that appears at the side click on
![]() sometimes you might have to scroll
the programs menu by holding your mouse on the arrow at the bottom of the menu before you
see Windows Explorer.
sometimes you might have to scroll
the programs menu by holding your mouse on the arrow at the bottom of the menu before you
see Windows Explorer.
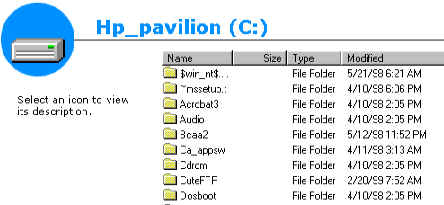
You will then see the Windows Explorer Window which looks like this:
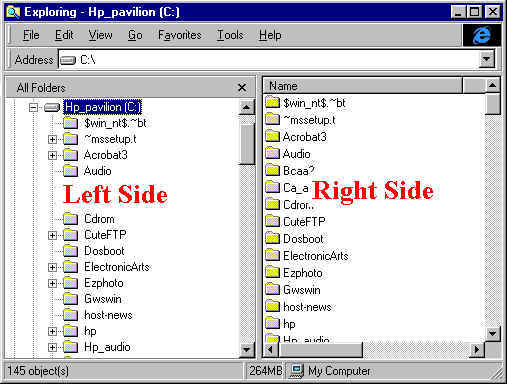
First we will deal with our File View Settings. The files and folders on the Right Side can be viewed in four different ways:
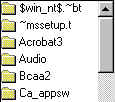
1.Large Icons

2. Small Icons
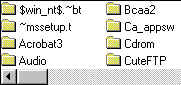
3. List
4. Details
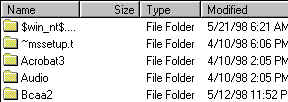
We will use the Details view because it contains the most information. To
set the Windows Explorer
Right
Side to the Details view, click
![]() to open the View menu and then click
to open the View menu and then click
![]() on that menu. The menu will close and you will then be set on
Details. Once you are set on Details, a
on that menu. The menu will close and you will then be set on
Details. Once you are set on Details, a
![]() will appear beside
will appear beside
![]() on the View menu each time you open it.
on the View menu each time you open it.
Next we will deal with the View as Web Page mode. if you have Windows 98 or a upgraded version of Windows 95 it may be set on View as Web Page in which case the Right Side will look something like this:
We do not want to view the
Right Side as a Web
Page because it takes up space and doesn't accomplish anything. To remove this View as Web
Page setting click ![]() to open the
View menu and then click
to open the
View menu and then click
![]() , The View menu will close and the View as Web Page setting
will not be removed. Once you have removed this setting the
, The View menu will close and the View as Web Page setting
will not be removed. Once you have removed this setting the
![]() will not appear beside
will not appear beside
![]() on the View menu, if you open it.
on the View menu, if you open it.
Next we will deal with Hidden Files. Windows will
hide certain files and/or parts of file names if you do not adjust the "factory"
settings to avoid this. So that nothing is hidden, click
![]() to open the View menu and then
click
to open the View menu and then
click ![]() at the bottom. If you
have an earlier version of Windows 95
at the bottom. If you
have an earlier version of Windows 95
![]() is simply called
is simply called
![]() . You will open a
. You will open a
![]() window and if you are not already on the
window and if you are not already on the
![]() tab, click on
tab, click on
![]() to change tabs (pages). Depending
on you version of Windows 95/98 the
to change tabs (pages). Depending
on you version of Windows 95/98 the
![]() tab in the
tab in the
![]() window looks something like this:
window looks something like this:
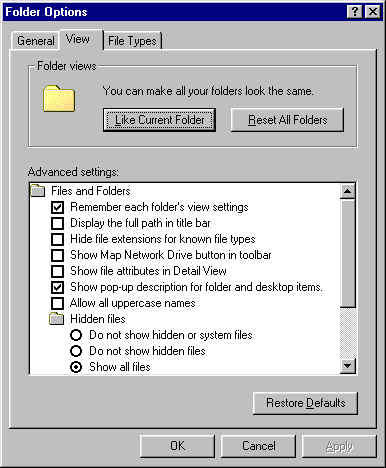
Be sure you have a dot beside Show all files
![]()
Be sure you do not have a check in the box beside Hide file extensions for
know file types ![]() . Depending
on your version of Windows 95/98 this box may look a little different and the wording my be
something like Hide MS-DOS file extensions for file types that are registered.
. Depending
on your version of Windows 95/98 this box may look a little different and the wording my be
something like Hide MS-DOS file extensions for file types that are registered.
Then click ![]()
We are done. Now what you see in Windows Explorer will be detailed and complete, and it will be the same as what you will see pictured in these Tutorials.
If you plan to use telephone technical assistance, you must adjust your View settings as shown on this page.