Like most Windows® programs there is always more than one way to accomplish a task. In the following tutorial you'll be taken through a typical series of steps to produce a professional looking CMA document.
Step 1: Generate a list of comparable properties by doing one or more searches in INTERFACE™. In the example below we have 18 comparable properties with a variety of different statuses. You can have as many comparables as you deem appropriate.
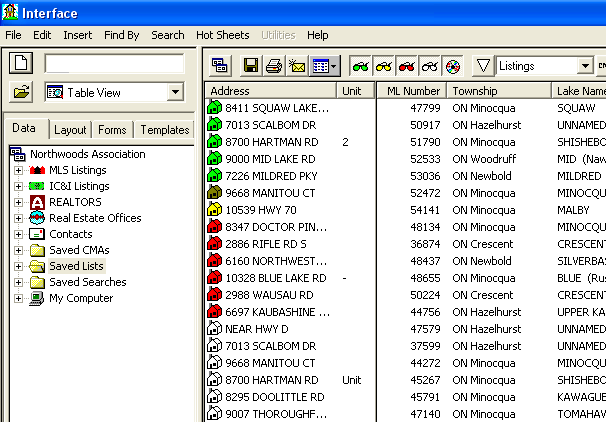
Step 2: Once you have assembled the comparable properties click on the CMA button.

A CMA window will open like this ...
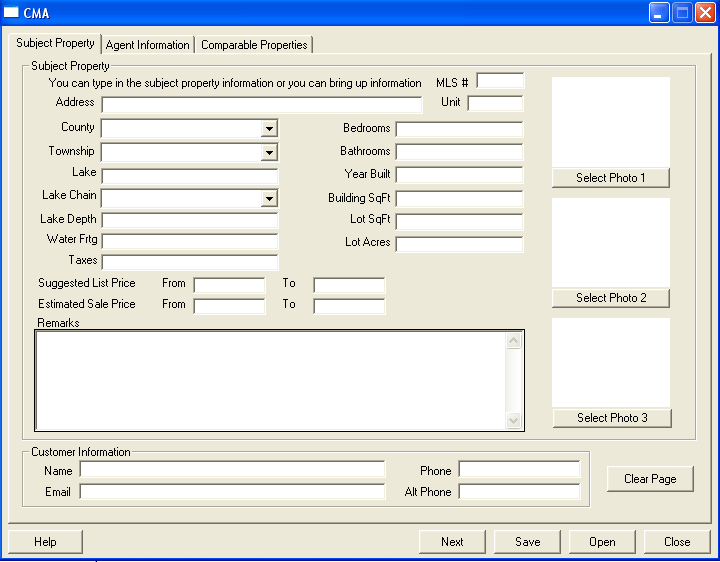
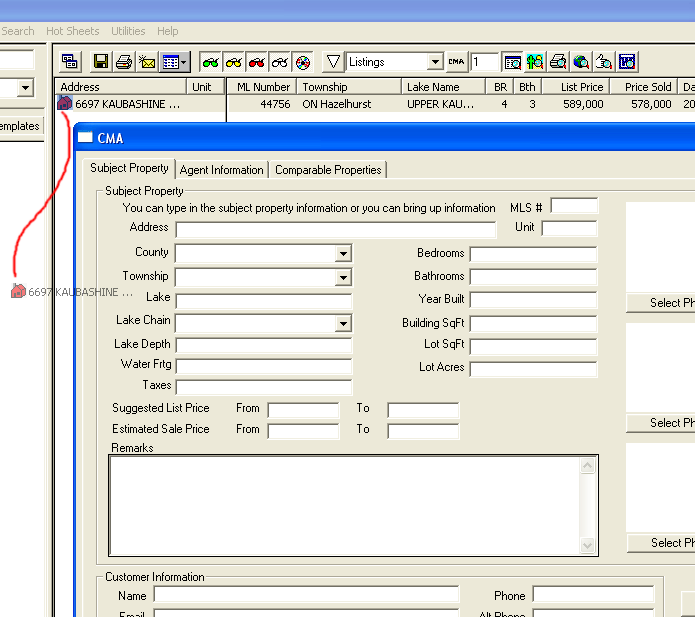
Step 3: Complete the Subject Property information. Note: If you are producing a CMA for a property that has been previously listed you can find the property and drag and drop it onto the Subject Property tab as shown below. Alternately you can enter the MLS # or complete the Subject Property tab information by hand.
The following screen shot shows a completed Subject Property tab ...
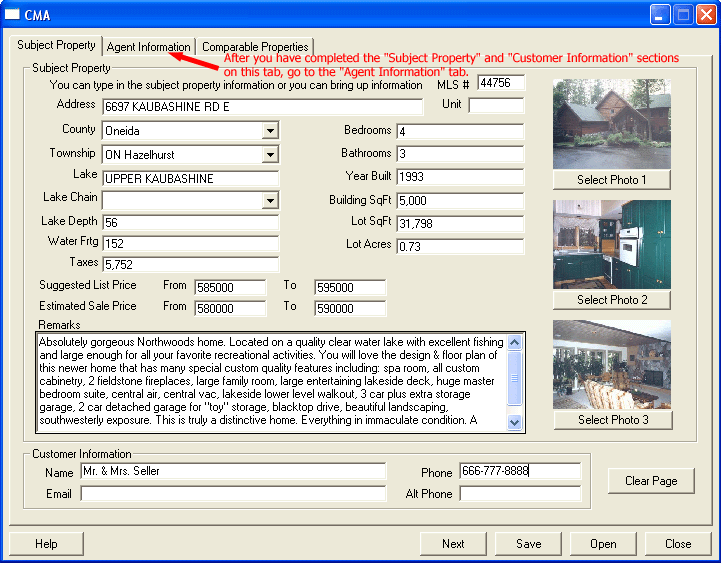
Step 4: Complete the Agent Information tab as shown ...
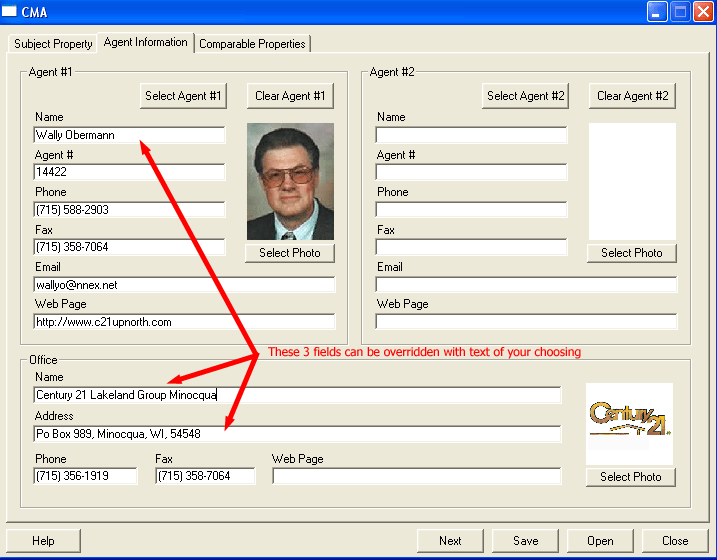
If you have a real estate partner you can complete the Agent #2 section.
Step 5: The comparables you generated in Step 1 can be found on the Comparable Properties tab ...
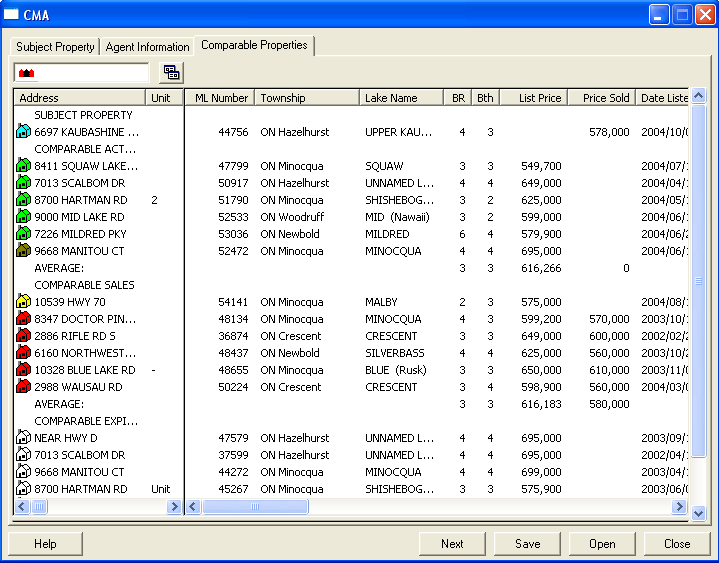
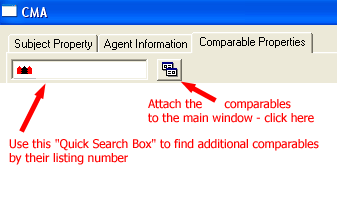
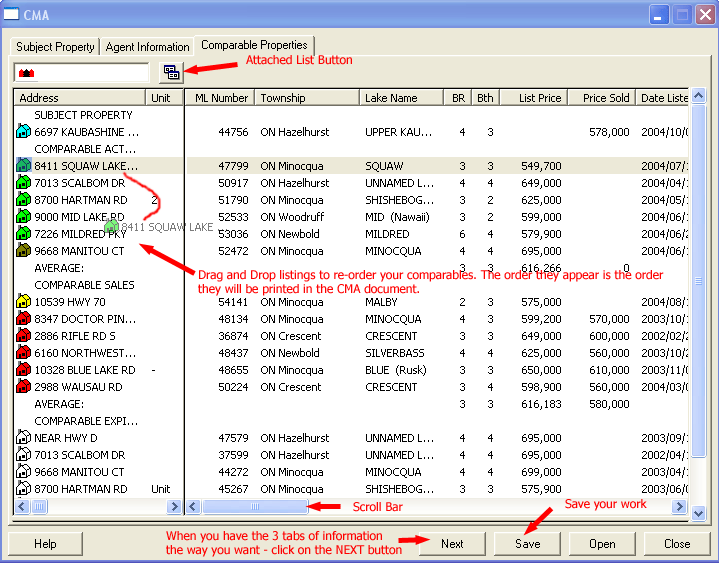
On this tab (see screen shot below) you can re-order the comparables within the various status categories, double click on any listing to view the details, scroll the columns of information using the horizontal scroll bar, attach the contents of this tab back to your main work space by clicking the "attach list" button, save your work for another day or click on the Next button.
Now go to the "Printing Your CMA" page - click here