This page explains how to install a Windows program on your hard drive. If a program stops working properly, in most cases you can fix the problem by reinstalling the program.
Step 1:
Click the Start button on the Windows Taskbar.
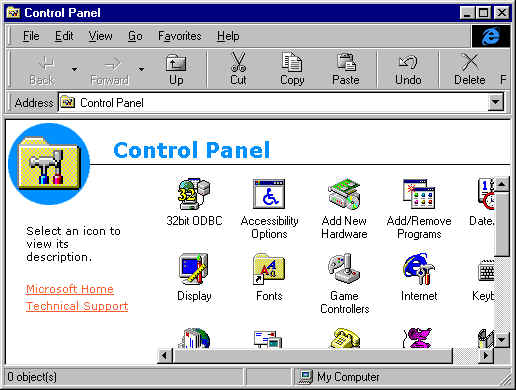
Then move your mouse up to Settings on the Start menu and then click Control Panel. A Control Panel window will appear like this:

Step 2:
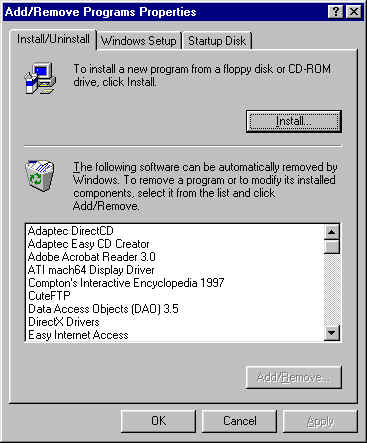
In the Control Panel window double click Add/Remove Programs. An Add/Remove Programs Properties window will appear like this:

Step 3:
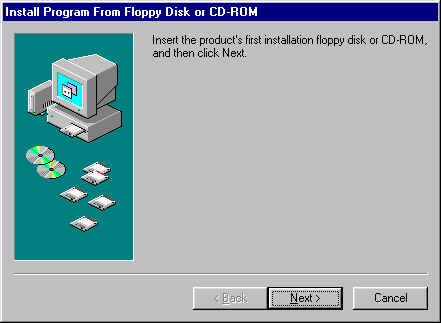
Click the Install button in the Add/Remove Program Properties window. An Install Programs From Floppy Disk or CD_ROM window will appear like this:

Step 4:
Do as the Install Program From Floppy Disk or CD_ROM window says. Insert the product's first installation floppy disk or CD-ROM.
Step 5:
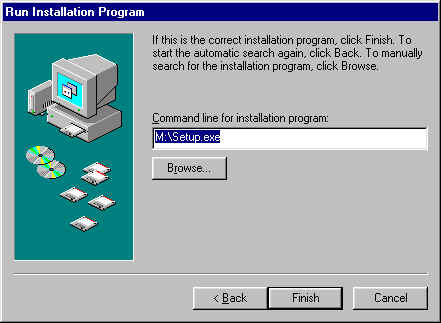
In the Install Program From Floppy Disk or CD_ROM window, click Next. The computer will search your installation media and then a Run Installation Program window will appear, like this:

Step 6:
If the computer succeeded in finding the setup program, its file name will be displayed in the box labeled Command line for installation program. If the correct installation program name is not displayed there, you will have to click the Browse... button and find it yourself. If the correct setup program is displayed then click the Finish button. Thereafter, follow the setup program's installation instructions to install the program.
NOTE: It is recommended that you install programs to a drive other than your C: drive whenever possible.